

Where to find it
1
Open your chatbot
From Chatbots, click the chatbot you want to work on.
2
Open Settings
In the left sidebar, under Manage, click Settings.
3
Scroll to Collecting data
Click Contact form, Variables or Satisfaction / feedback to
expand it.
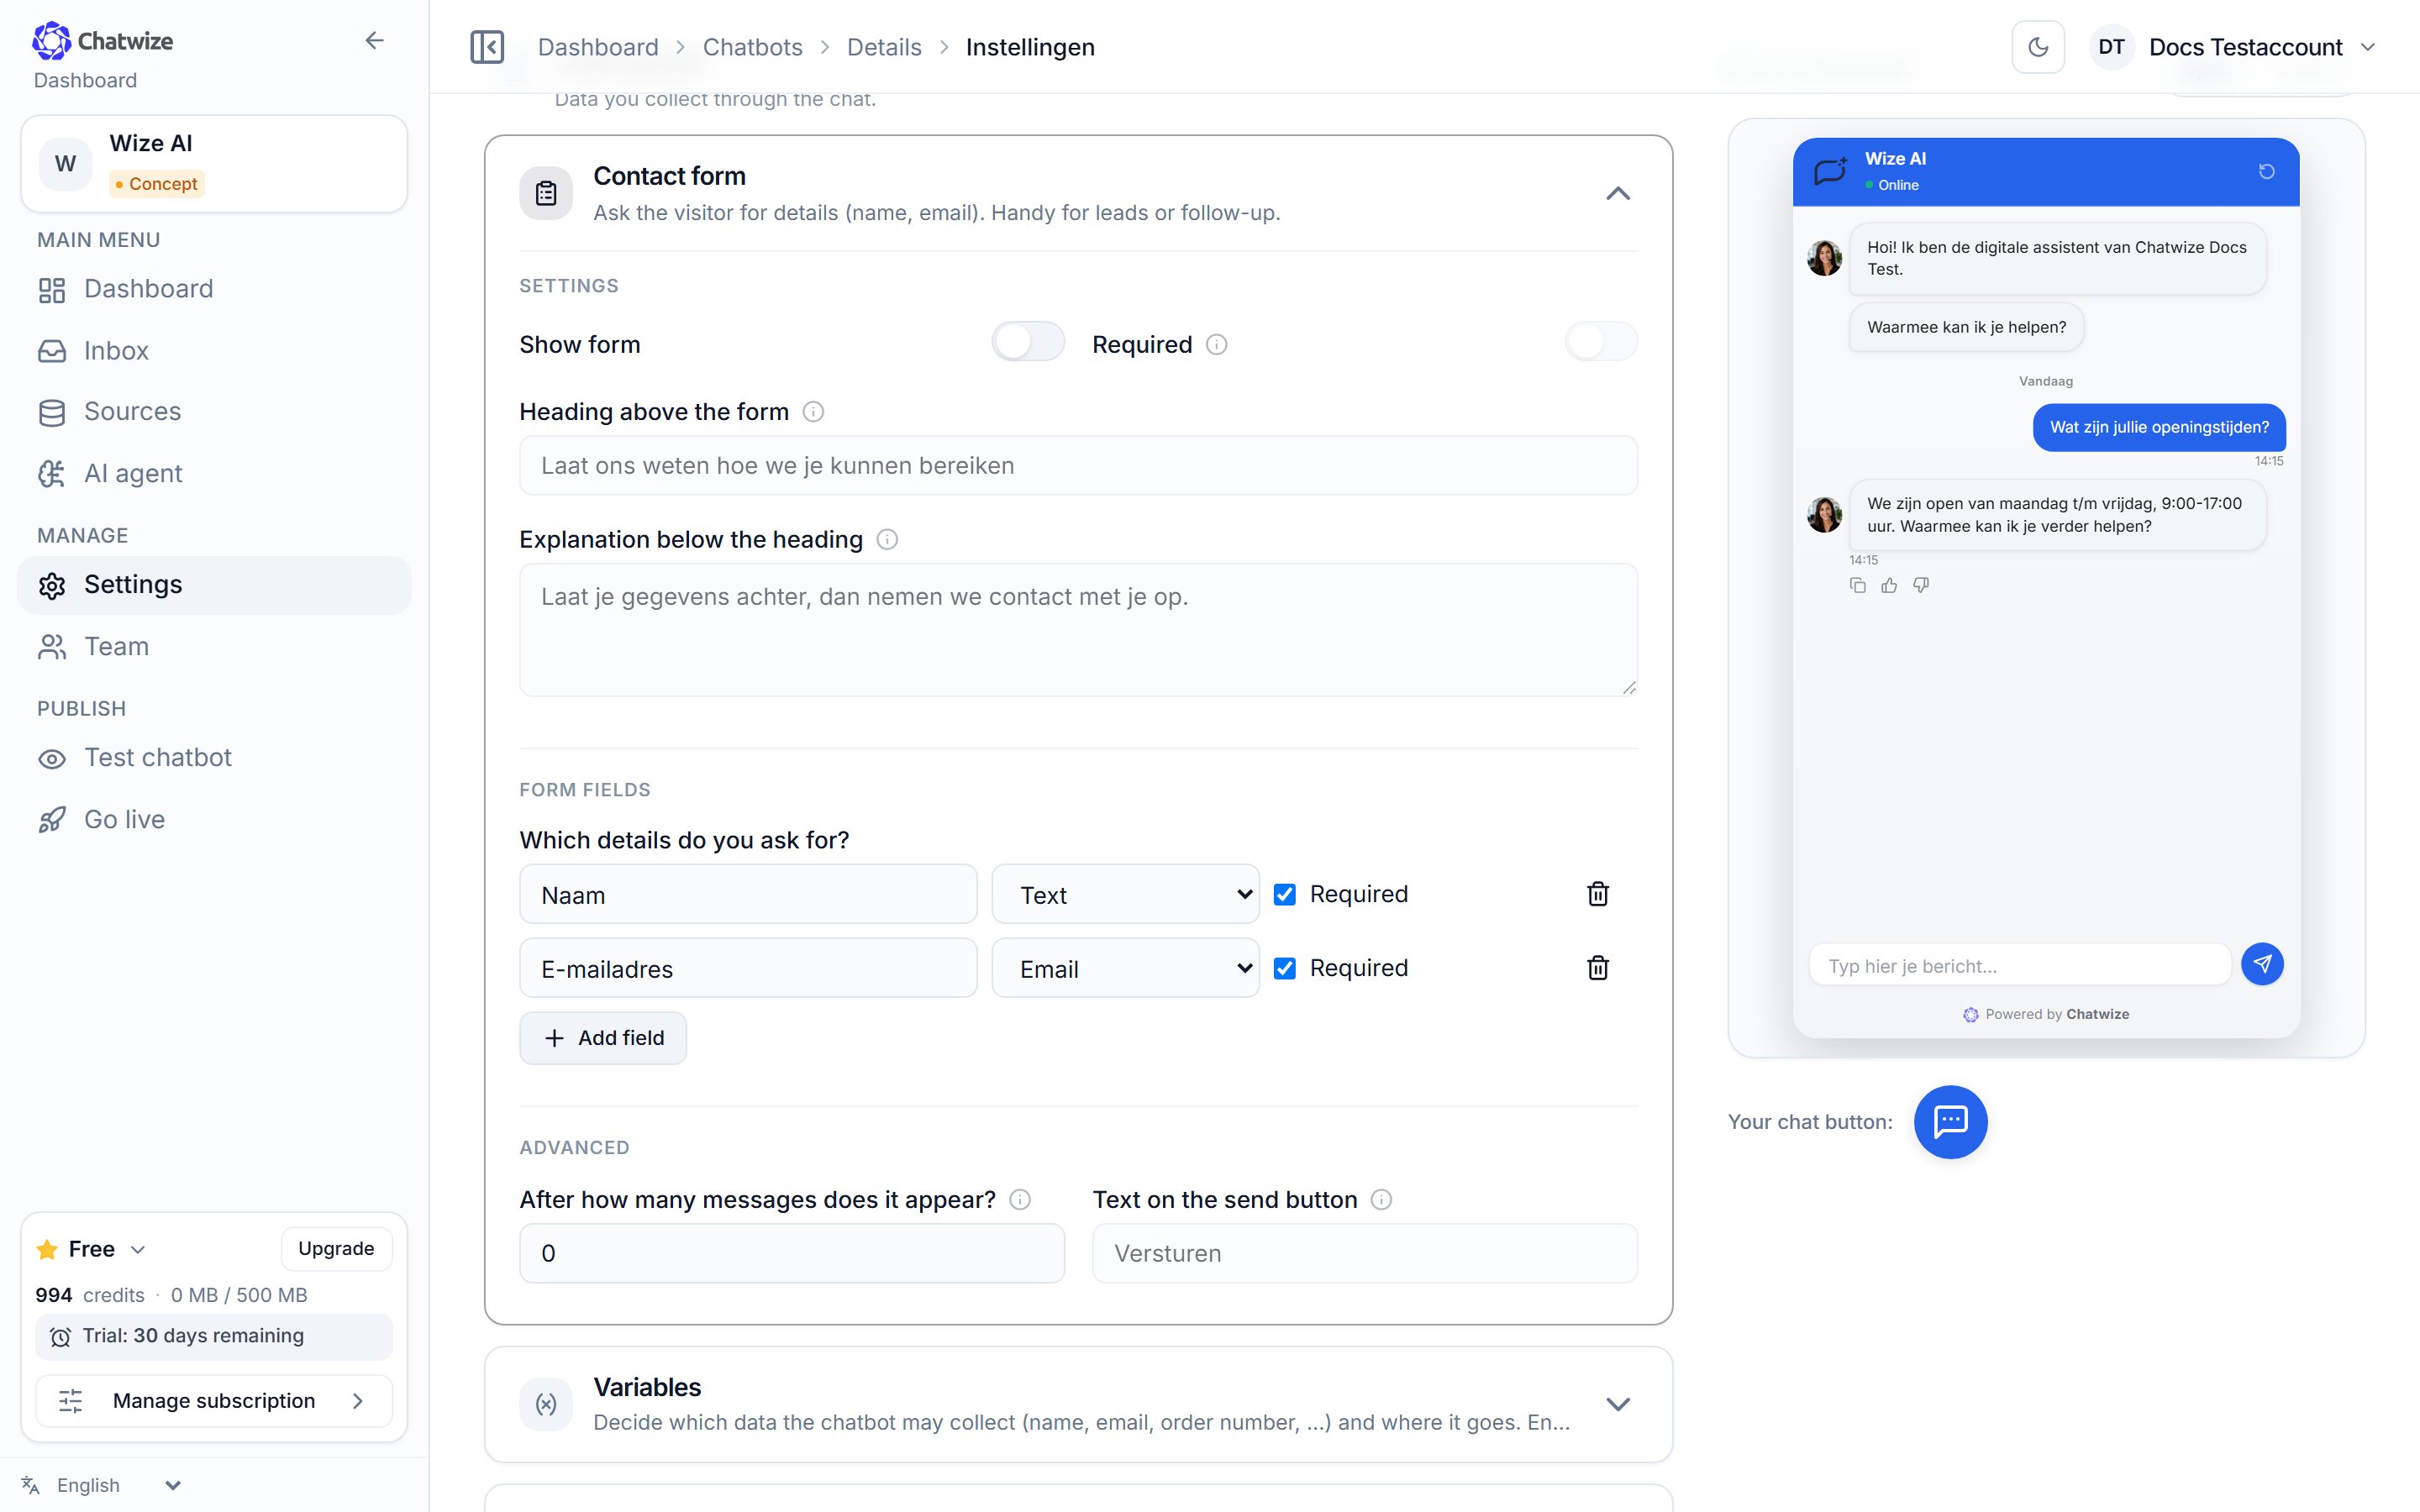
Settings → Collecting data, with Contact form and Variables.
Three sections
Contact form
Ask the visitor for details (name, email) with a form in the chat. You decide
the fields, whether they’re required, and after how many messages it appears.
Variables
Decide which data the chatbot may collect (name, email, order number, …) and
where it goes.
Satisfaction / feedback
Put thumbs under the AI’s answers, with an optional comment from the visitor.
Letting variables fill themselves
Per variable you can turn on that the assistant recognises it itself in the conversation. If a visitor simply mentions their email address in a sentence, it’s captured without you having to show a form.Where the data goes
Everything collected sits in Inbox → Data, with a link back to the conversation it came from. Form submissions and variables are shown together, with a label showing where each entry came from. From that page you export everything to CSV. Automatic forwarding is set in the Forwarding & integrations group:- Email notifications — a message to your own inbox.
- Webhook — data to your CRM, spreadsheet or automation tool.